Beyond Proxies: Cheaply routing traffic to another country to avoid Geo Restrictions for ~$20/year
We haven’t used cable / satellite since 2006. Unfortunately, some online streaming services have restrictions, so when we visit them we must appear to be in a different location. Until now, we have been successfully using our existing server and VPN intrastructure (where this site his hosted for example), to additionally have a Squid proxy server and simply changing the proxy server to change our country. This has served us well except for Christmas I have a Chromecast which as far as I can tell, doesn’t allow for Proxy settings.
We already have the following infrastructure to support the proxy server
- Linux virtual machine (VPS) in the UK, US and NL
- Squid running on the VPS
- DD-WRT on our router at home
- OpenVPN Server on the VPS, and Client on DD-WRT
In order to solve the proxy server issue my plan will be to segment our network at home and depending on which IP you receive on your system, you will receive a different route to the internet. By default, you will come out of the router on the local internet (standard router), however if the IP address is in the range 192.168.0(.32-.48), you will get a special route which the next hop is over the VPN and out of the VPS. Changing your clients IP will then change what country you appear to be in. Finally, static DHCP leases will be used so that whenever the Chromecast requests an IP address, it will always get 192.168.0.33 — or — the Chromecast will always appear to be in the UK. Any other devices that need to appear to be in the UK can then either be assigned a static IP by hand in the device, or another static DHCP lease can be configured for the device if it needs to be more permanent.
This also has the benefit as some players use a different software to stream the video content, and the software does not respect the proxy settings of the operating system. This means that browsing the site and choosing a video work, up to the point where the video is supposed to start, at which time the proxy server is ignored and the error pops up. With the routing configuration, these should work as well!
To set this up, the following must be configured:
- The VPS
- OpenVPN Configuration
- IP Forwarding and NATting
- DD-WRT
- OpenVPN Configuration
- IP Route Configuration
- DHCP Configuration
- Chromecast (and other devices)
Part 1 – the VPS
The VPS is what ends up costing money. I have had great luck with lowendbox.com which is a blog that collects special offers for VPSes. You can usually find a decent VPS for around $1 per month, and some special offers are as low as $6 per year (these are generally in the US)
So far I have used ~15 different providers found via lowendbox, and all except one has been excellent. The one not-so-good experience I could tell within the first 48 hours that this was going to be bad, so my recommendation is when getting a new VPS, order one and try it out for a few days — if it is problem-free for the first few days, then it will probably be problem-free for a few years. The price in the UK is usually a bit higher, I am paying around 1 GBP per month for my VPS. A example of a recent offer on lowendbox for a UK VPS is this one
For $25 per year, you get a virtual machine with 256Mb ram, 10Gb drive storage, 100Gb/month transfer and 1 IPv4 address. When choosing a VPS, anything with more than 256Mb ram, and 2Gb storage is enough to run Linux and Squid. I primarily look at the traffic transfer as the next point, as you must divide this by two when using it as a router/proxy (when downloading a 10Mb file via VPS, first the VPS must download 10Mb and then ‘upload’ 10Mb to you wherever you are at home, so the 10Mb file actually costs 20Mb bandwidth).
During the VPS order, I choose Debian 64bit and everything else standard. The provisioning is usually instant, and I can login with the root password and begin installing stuff.
OpenVPN Configuration
Install OpenVPN:
sudo apt-get install openvpn
Generate the VPN Keys according to the OpenVPN Documentation
My server configuration is as follows:
server 192.168.1.0 255.255.255.0
port 1194
proto udp
dev tap
ca ca.crt
cert ukserver.crt
key ukserver.key
dh dh.pem
ifconfig-pool-persist ipp.txt
client-to-client
keepalive 15 60
comp-lzo
verb 2
crl-verify /etc/openvpn/crl.pem
route 192.168.0.0 255.255.255.0 192.168.1.2
With this configuration, OpenVPN is up and running and listening on port 1194. It will also add a static route to the 192.168.0.X network via the gateway 192.168.1.2, which when DD-WRT is setup, it should receive this IP address on the VPN.
IP Forwarding and NATing
The next steps are to instruct Debian to do IP Forwarding and NAT Translation. The commands here are:
iptables -t nat -A POSTROUTING -s 192.168.0.0/24 -j MASQUERADE
echo 1 > /proc/sys/net/ipv4/ip_forward
Any packet that arrives at the linux box from the network 192.168.0.X will then be “masqueraded” as the public IP of the linux box in the UK. These can be made permanent by the following:
/etc/network/options: ip_forward=yes
iptables-save > /etc/iptables.up.rules
vi /etc/network/if-pre-up.d/iptables and add:
#!/bin/sh /sbin/iptables-restore < /etc/iptables.up.rules
chmod +x /etc/network/if-pre-up.d/iptables
At the same time it is useful to setup other IPTables rules to only allow certain traffic in and out. Since this server does other duties, these special rules don’t apply here in this scenario.
The setup of the server is now complete, and we can move on to the router.
Part 2 – DD-WRT
My favourite router is the NetGear WNDR4000 – it is my go-to replacement for the ancient WRT-54GL, however the WNDR-4000 is also a bit long in the tooth. The bonus is you can pick them up used for between $20 and $50. I am running the recommended firmware from the DD-WRT Wiki, the 22000++ KONG, VPNÂ variant.
OpenVPN Configuration
Under Services -> VPN
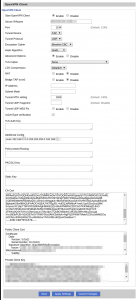
you can find the OpenVPN Client configuration. The important details are as follows, which should match the information from your VPS Provider and the configuration you have made in the OpenVPN Server
- Server IP/Name: IP address (or if you have a domain name, the domain name) of the server you have bought above
- Port 1194 (Default)
- Tunnel Device: TAP (Matches the “dev tap” in the server configuration)
- Tunnel Protocol: UDP
- NAT: Disable
- Bridge TAP to BR0: Disable
- CA Cert: The contents of your CA Certificate
- Public Client Cert: The contents of client certificate generated above (hint: this is not the server certificate!)
- Private Client Key: This is the secret private key of the client
My configuration is as follows:
IP Routing Configuration
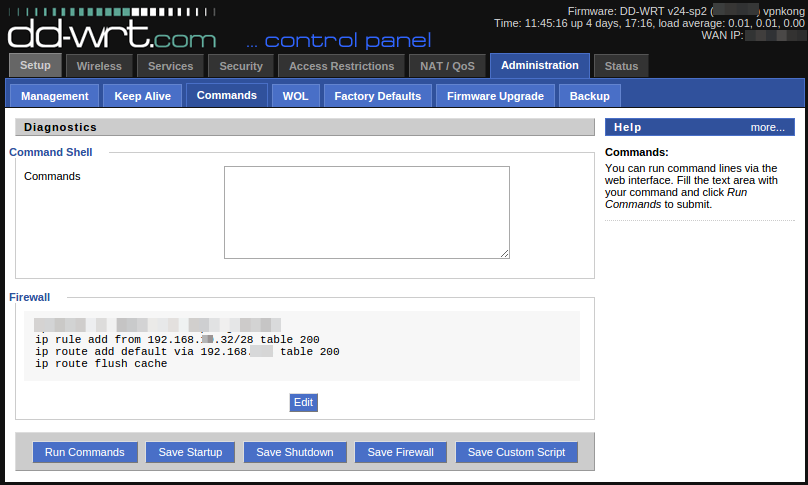
Under Administration -> Commands, you can enter commands that the router will run on boot or when interfaces come up.  The following 3 commands will create an exception when the client IP range is in  192.168.0.32-192.168.0.48, and send via the default route 192.168.1.1 which should be the VPS Server in the UK:
ip rule add from 192.168.0.32/28 table 200
ip rule add default via 192.168.1.1 table 200
ip route flush cache
Static Client Leases Configuration
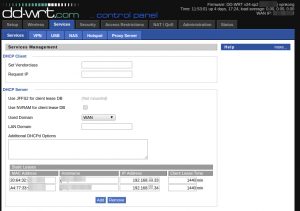
The last step is to finally configure specific clients to always receive an IP address in the special range. For this, I have two devices a cell phone (used as a remote) and the chromecast itself. These are entered in Services -> Services as Static leases:
At this point, when the Chromecast (or phone) registers on the network, first DHCP should jump in and assign the IP address 192.168.0.33. Next, the routing tables on DD-WRT pick this client range out, and set the next hop as 192.168.1.1 which gets tunneled over the VPN to the UK. Finally, when the traffic arrives at the server in the UK, the ip_forward and masquerade rules take effect and perform NATing (just like dd-wrt would have done with our local IP at home), except this system is in the UK.
Since this all happens on the network level, no configuration is required on the Chromecast. Any device can now appear to be located in the UK if we manually assign an IP address in the 192.168.0.32-48 range – either by a static DHCP lease (for devices that always should appear in the UK), or temporarily by assigning a static IP address in the client.


