AWS IoT Contest
AWS held an IoT Contest July 13-17 2017, and this describes my entry (which won! Woohoo!). You can see a video description of this project here. You can also see the page on hackster.io here.
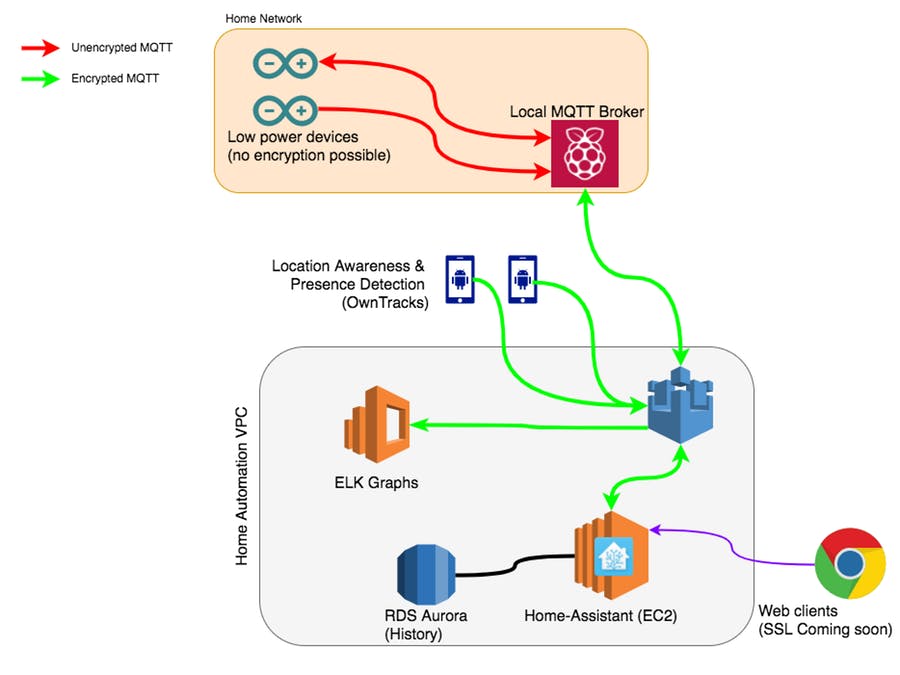
This project provides integration between Home Assistant, AWS IoT, and low power devices running on the ESP8266. Â The ESP8266 has many firmwares, which provide additional functionality for devices like the Sonoff or MagicHouse LED Controllers. Most of these firmwares, however, don’t provide the ability to speak encrypted MQTT with client certificates, which is required by AWS for security.
During the contest, Jan Metzner from AWS made me aware of the MongooseOS Project, which can handle certificates. Using firmwares like this would let you use encrypted MQTT; however, I haven’t found a single firmware like Tasmota or Espurna, which allows for this out of the box.
This project describes a central component which glues together many of my various home automation components. These  components are detailed on separate pages:
- MagicHouse LED Controller (ESP8266 RGB LED Strip controller)
- Smart Node
- IR/433mhz Gateway
The easiest, secure option is to use the WiFi encryption in the local network, and speak locally to a gateway via unencrypted MQTT, and then on a beefier raspberry pi send the communication to AWS for processing.
Future additions will integrate AWS GreenGrass to allow some logic to be handled on the raspberry pi locally itself, in case the internet is not working. As it is now, I am completely dependent on the cloud, and if my internet connection fails then everything at home stops working. An example of the current logic is as follows:
The rest of this post will describe how I setup AWS and the Mosquitto gateway locally. My goal is to learn AWS, as well as have a single central location for all my home automation logic.
Setting up the Pi Gateway
Install Raspbian or your favourite Raspberry Pi Linux. Note: if you’re using Raspbian, the version of Mosquitto (1.3), which comes with it by default, does not work. You will need to install 1.4 from mosquitto.org. You can install this with the following commands:
root@homeautomation # echo "http://repo.mosquitto.org/debian jessie main" > /etc/apt/sources.list.d/mosquitto-jessie.list
root@homeautomation # apt-get update
[...]
root@homeautomation # apt-get install mosquitto
[...]
Setting up mosquitto (1.4.14-0mosquitto1-jessie1) ...
To configure Mosquitto to connect to AWS IoT, you will need to add the following to /etc/mosquitto/mosquitto.conf:
# =================================================================
# Bridges to AWS IOT
# =================================================================
connection awsiot
address your-iot-endpoint.iot.eu-central-1.amazonaws.com:8883
# this is NOT a comment below, # is the mqtt term for wildcard,
# so topics matching "everything" go in both directions
topic # both
bridge_protocol_version mqttv311
bridge_insecure false
cleansession true
clientid bridgeawsiot
local_clientid awsiobridge
try_private true
start_type automatic
notifications false
log_type all
bridge_cafile /home/mitchese/homeassistant/rootCA.pem
bridge_certfile /home/mitchese/homeassistant/cert.crt
bridge_keyfile /home/mitchese/homeassistant/private.key
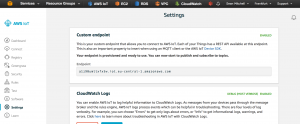
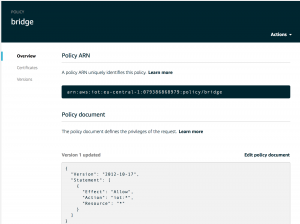
You can find the MQTT Bridge hostname under IOT -> Settings -> Custom Endpoint:Â  The keys and certificates are provisioned from the AWS IoT page. I defined a policy that allows the bridge to do anything; you may consider reducing the policy to only allow publishing to a certain branch, but to keep things simple I allow my gateway to do anything on MQTT:
The policytext is as follows
{
  "Version": "2012-10-17",
  "Statement": [
    {
      "Effect": "Allow",
      "Action": "iot:*",
      "Resource": "*"
    }
  ]
}
Setting up the EC2 Instance for Home Assistant
Home Assistant will run in EC2. I provisioned a micro EC2 instance. Once it was booted, I installed the requirements for Home Assistant:
[ec2-user@ip-xxx ]$ yum update
[...]
[ec2-user@ip-xxx ]$ yum groupinstall 'Development Tools'
[...]
[ec2-user@ip-xxx ]$ yum install mysql-devel mysql-lib python35-devel python3 python35-pip
[...]
[ec2-user@ip-xxx ]$ pip3.5 install mysqlclient homeassistant
You can find the Home Assistant configuration under /home/ec2-user/.homeassistant/configuration.yaml
To set up Home Assistant to connect to the AWS IOT Gateway, add something like this:
mqtt:
   certificate: /home/ec2-user/.homeassistant/ca-chain.pem
   client_key: /home/ec2-user/.homeassistant/097a2b0e29-private.pem.key
   client_cert: /home/ec2-user/.homeassistant/097a2b0e29-certificate.pem.crt
   broker: your-broker-id.iot.eu-central-1.amazonaws.com
   port: 8883
   tls_version: '1.2'
   tls_insecure: false
I originally didn’t have “tls_version: 1.2”, which resulted in the error “ssl.SSLError: [SSL: WRONG_VERSION_NUMBER] wrong version number”. Adding “tls_version: 1.2” resolves this error.
AWS RDS proved very expensive (you can run mysql in the same EC2 instance as Home Assistant to save a bit on your AWS bill). If you’re using RDS, which I initially setup, you can add the following to the configuration.yaml to connect to the RDS instance:
recorder:
  db_url: mysql://<user>:<password>@<instancename>.cluster-cpqmidsucdp3.eu-central-1.rds.amazonaws.com/<databasename>
  #example mysql://homeassistant:somesecret@sean-iot-cluster-1.cluster-cpqmidsucdp3.eu-central-1.rds.amazonaws.com/homeassistant
As an alternative to RDS, you can simply install MySQL/MariaDB or a database of your choosing on the EC2 system where Home Assistant is running.
At this point, the Raspberry Pi in my local network is setup and connected to AWS IOT Gateway, and Home Assistant is running in EC2 and also connected here to perform actions. I initially thought that delays in the network would slow down the automation actions; however, I haven’t noticed a difference between the on-site Home Assistant and the one running in AWS.
My next steps will be to try to implement GreenGrass, so in case my internet connection at home fails, I still have some basic automation functionality and caching for when the clouds return.


